
x
Thinking about adding a video doorbell or upgrading an old chime? This guide helps you compare battery and wired options, check wiring, transformer and chime compatibility, estimate installation and replacement costs, and avoid Wi‑Fi problems before you start drilling.
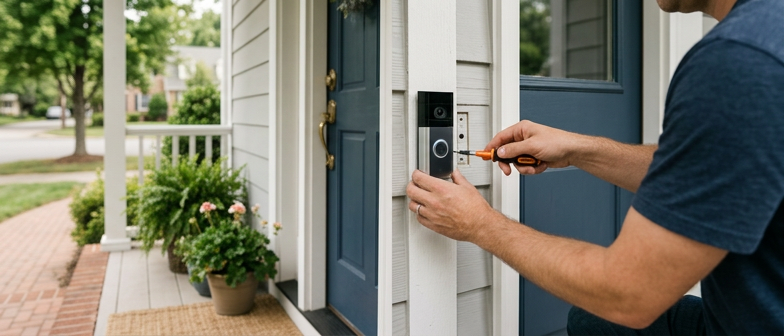
Before you begin any video doorbell installation, decide how the device will fit into your home. A video doorbell replaces or supplements the existing button and connects to Wi‑Fi so you can see and talk to visitors through an app. Most homes use either a battery‑powered unit that mounts almost anywhere or a hardwired model that connects to the existing doorbell circuit. Think about how often you are willing to recharge a battery, whether you already have a working indoor chime, and how comfortable you feel working around low‑voltage wiring. If you are unsure what is typical for a home like yours, online guides or a quick installation estimate from a local professional can help you understand your options.
A battery video doorbell installation is usually best for renters, homes without a usable circuit, or anyone who wants simple mounting with minimal drilling. A hardwired setup suits people who prefer a permanent solution, do not want to think about charging, and already have reliable wiring and a compatible transformer. As you plan, consider future video doorbell replacement cost if you upgrade later, and compare doorbell installation services if you expect to hire help instead of doing the work yourself. Clarifying these choices early reduces the risk of buying the wrong style of doorbell and helps keep the installation aligned with your home’s layout, power, and budget.
| Installation Type | DIY Difficulty | Typical Support Needs | Best For | When To Hire A Pro |
|---|---|---|---|---|
| Battery video doorbell | Low | App setup and mounting tips | Renters and simple upgrades | If unsure about placement or Wi‑Fi reliability |
| Hardwired video doorbell | Medium to High | Wiring, transformer, chime checks | Owners wanting a permanent setup | If wiring or power specs are confusing |
| Switching from battery to hardwired later | Medium | Circuit verification and chime compatibility | Users planning future upgrades | When comparing services and installation estimates |
| Full replacement with new brand or model | Medium | Old device removal and app migration | Homes ready for a long‑term system | If replacement cost and options are unclear |
Before mounting a new video doorbell, turn off power at the breaker and check the existing wiring at the button and chime. Remove the old doorbell and inspect the conductors for frayed insulation, corrosion, loose connections, or signs of overheating such as burn marks or melted plastic. Take clear photos of how each wire is attached so you can match terminals later. If the hardware is rusted in place, tangled with other low‑voltage devices, or the cables look damaged, consider using a professional removal service and pause installation until the wiring is safe.
Then confirm that the transformer can power the new unit. Check the label to verify that its voltage and VA rating meet the video doorbell manufacturer’s requirements, noting that many transformers sit near the main electrical panel, HVAC equipment, or the indoor chime. If the label is missing, wiring is confusing, or you are unsure how to test voltage, hiring a licensed electrician for doorbell wiring is safer than guessing. A qualified pro can verify transformer compatibility, upgrade an undersized unit, and ensure the circuit is code‑compliant.
After you understand the condition of the wiring and transformer, include any upgrades in your overall video doorbell replacement cost. Solid wiring and a compatible transformer usually mean you only pay for the device and straightforward installation. New cable runs, chime rewiring, or removal of old mechanical parts embedded in the wall will increase labor charges. Ask for a written video doorbell installation estimate that separates parts, transformer work, and wiring repairs so you can accurately compare service options and decide whether to keep the existing power setup.
Before mounting a new video doorbell, confirm that the existing transformer matches the video doorbell’s voltage and VA requirements. Turn off power at the breaker, read the label on the transformer near the electrical panel or chime box, and compare it with the installation guide. An undersized or incompatible transformer can prevent the unit from starting, cause overheating, or shut the device down, so replace it with a compatible model if the specs fall outside the recommended range.
After confirming transformer compatibility, check whether the indoor chime works with your smart doorbell and be ready to adjust or fix the chime if needed. Many devices only support specific mechanical or digital chimes, and some require bypassing the existing chime in favor of app alerts or a plug‑in speaker. Use the manufacturer’s compatibility chart, verify chime wiring, follow the app setup, and if buzzing, constant ringing, or silence continues, recheck settings and consult a licensed electrician.
When planning a video doorbell installation, decide where you want visitors to stand and what area you need the camera to cover. Mark a mounting height that captures both faces and packages, usually around chest to eye level, and dry‑fit the bracket before drilling. For a battery video doorbell installation, remove any old button or housing, fully charge the battery, then secure the mounting plate to a solid surface with the supplied anchors. Attach the doorbell to the bracket, confirm it is firmly locked, and use the app to connect it to your home network so you can verify the video feed and notifications before you patch old screw holes.
If you are replacing a wired chime button instead of using a purely battery model, shut off power at the breaker and confirm the circuit is dead with a non‑contact tester. Remove the existing button, label the low‑voltage conductors, then disconnect them, or have an old doorbell removal service handle this if the wiring is fragile. Mount the new backplate, connect the low‑voltage leads to the smart button terminals per the manual, and tuck excess wire gently into the junction box. When new cabling is required or existing wires are corroded or shorted, hiring a licensed electrician for doorbell wiring helps keep the transformer, chime, and circuit within code.
Once the battery‑powered or hardwired unit is mounted, finish setup through the doorbell app and confirm that live view, motion alerts, and the chime respond correctly. With wired models, test the mechanical or digital chime several times to ensure the hammer or speaker triggers reliably and that the transformer does not buzz or overheat. If problems persist beyond simple app settings or loose terminals, document the symptoms and contact a professional to check the transformer, low‑voltage wiring, and chime so you avoid repeated failures and protect your new smart doorbell.
Call a professional for video doorbell installation when existing wiring is confusing or looks unsafe. If you do not know which breaker feeds the circuit, see frayed or aluminum wires, or have an older low‑voltage setup, an electrician for doorbell wiring should handle it. A licensed pro can test voltage, confirm the transformer works with a modern camera, and keep the work within electrical code.
Professional help is also useful when comparing installation options and costs. Request a video doorbell installation estimate from several local providers and compare doorbell installation services by what they include, such as wiring checks and chime setup. If you are swapping an older unit, ask about the expected video doorbell replacement cost so you can decide between a flat‑fee installer, hourly electrician, or bundled home‑services package.
Before you finish your video doorbell installation, confirm that your home Wi‑Fi is strong where the doorbell will be mounted. Stand at the spot, connect your phone to your home network, and run a basic speed or signal test. If pages load slowly or video buffers, the camera may struggle to stream reliably. Many brands include tools or simple guides in their apps that show signal strength for the doorbell camera. If the connection is weak, move the router closer, add a Wi‑Fi extender or mesh node near the door, or switch the doorbell to the 2.4 GHz band if supported, which usually reaches farther than 5 GHz.
Once the signal is solid, install the manufacturer’s app on your smartphone and create an account with a secure password, since this controls access to your video feed. The app will guide you through connecting the doorbell to Wi‑Fi, often by scanning a QR code or briefly joining a temporary setup network. Follow the on‑screen steps and wait for confirmation that the doorbell is online before you consider the video doorbell installation complete. Then adjust notification settings, motion zones, and shared access so household members can view live video and receive alerts without excessive false alarms.
How should I plan a video doorbell installation for my home and routine?
Choose between battery and wired models based on how often you can recharge, whether you already have doorbell wiring, where visitors usually stand, and if you want the existing indoor chime to ring.
What should I check in my existing doorbell wiring before mounting a camera doorbell?
Shut off the breaker, remove the old button, and inspect wires for frayed insulation, corrosion, loose screws, or burn marks. If anything looks damaged or unclear, stop and call an electrician familiar with doorbell wiring.
How do I check transformer and chime compatibility with a new video doorbell?
With power off, read the transformer voltage and VA and compare them with the doorbell manual. Confirm whether your mechanical or digital chime is listed as compatible; if not, you may need an adapter or to replace the chime.
When is a battery video doorbell better than a wired one, and what affects long‑term cost?
Battery units suit homes without wiring or where you want flexible placement. They avoid transformer work but require charging, and long‑term cost comes from buying new batteries or occasionally replacing the whole doorbell.
How can I avoid Wi‑Fi and app issues after installing a video doorbell camera?
Before drilling, stand where you’ll mount it and test Wi‑Fi on your phone. If speeds are low, move the router or add a mesh node or extender, then use the app’s setup tool to connect, check live video, and confirm chime alerts.